A little background:
A few years back, I built a kegerator out of a small fridge. That project was a total let down;
 it only took me 15 minutes and it being Sunday, (all the liquor stores were closed) I was unable to purchase a keg to try it out. Since then, I had expanded my interests and had decided to add a second tap (on the then current kegerator) for home made soda or seltzer. The problem with this setup was I could only have either a beer, a soda, or a seltzer on tap at a time. This was a major issue for me. I drink seltzer like it is going out of style and it takes me months to finish a pony keg of beer. So, I get the idea to build a bigger kegerator to host one of each (beer, soda, and seltzer).
The Project:
After doing some research, I found that turning a chest freezer into a refrigerator and using it as the platform for the kegerator was the way to go.

I needed to find a chest freezer...if it weren't for the wonders of Craig's List. After some searching for a few weeks, I was able to find a chest freezer that I thought would be big enough to fit a 15.5 gal keg and two 5 gal Cornelius (Corney) kegs. Of course, as soon as I got it home my plans changed....
Once unloading the FREE chest freezer from my truck and into the garage (its new home), I realized that it was actually big enough to hold even more than what I had anticipated...yippee (or so I thought). I'll get to that later.
There are basically two options
 for converting a freezer into a fridge. Option 1) Mess with the thermostat. Option 2) Purchase an external thermostat control module to override the main thermostat. I chose the second because I didn't feel like trying to find another freezer after ruining the first one when I screwed it up. Ok, so I couldn't find a good writeup for modifying the thermostat either.
The next decision I had to make was weather or not I wanted a tower setup on top of the freezer (like at a bar) or stick with shanks that would stick out of the side of the freezer. I liked the idea of the tower, but nice multi-head towers are very spendy and I'd have to deal with all the guts of the kegerator hanging down on top of everything inside along with issues when opening it. The problem with the shank idea is drilling into the side of the freezer and not hitting a freon line. This is fixed by building a collar.
By removing the freezer top and building a wooden collar around the rim (where you reattach and secure the top), you can effectively drill through the side without damaging the freezer. I used 2x6 and 1x12 to build the collar. The 2x6 becomes an inside collar while the 1x12 is the exposed outer collar which is used to "lock" down the inner collar to keep it secure around the freezer.


 Once the collar is locked down and secure, you can screw down the hinges. A little silicon
  caulk around all the inner edges finishes it all off and keeps all the cold air in. Next, drill a 7/8th hole for each shank wherever you want to put the taps.
I keep all my air bottles outside of the kegerator (this will save on air and allow more room for refreshments). So, I needed to drill 2 more holes in the side of the collar to for the CO2 and Nitrogen air lines and one more for the
 thermostat probe. I decided, since I have the room, I'd set up the kegerator so I could have a "nitrogen beer" or two like Guinness, Boddingtons, Caffrey's, etc. on tap
 as well. All these beers should be dispensed through a stout faucet with a nitrogen/co2 mix (usually 75%/25% - called beer mix - sometimes also available as 70%/30%) hence need for the second set of lines for the beer mix.
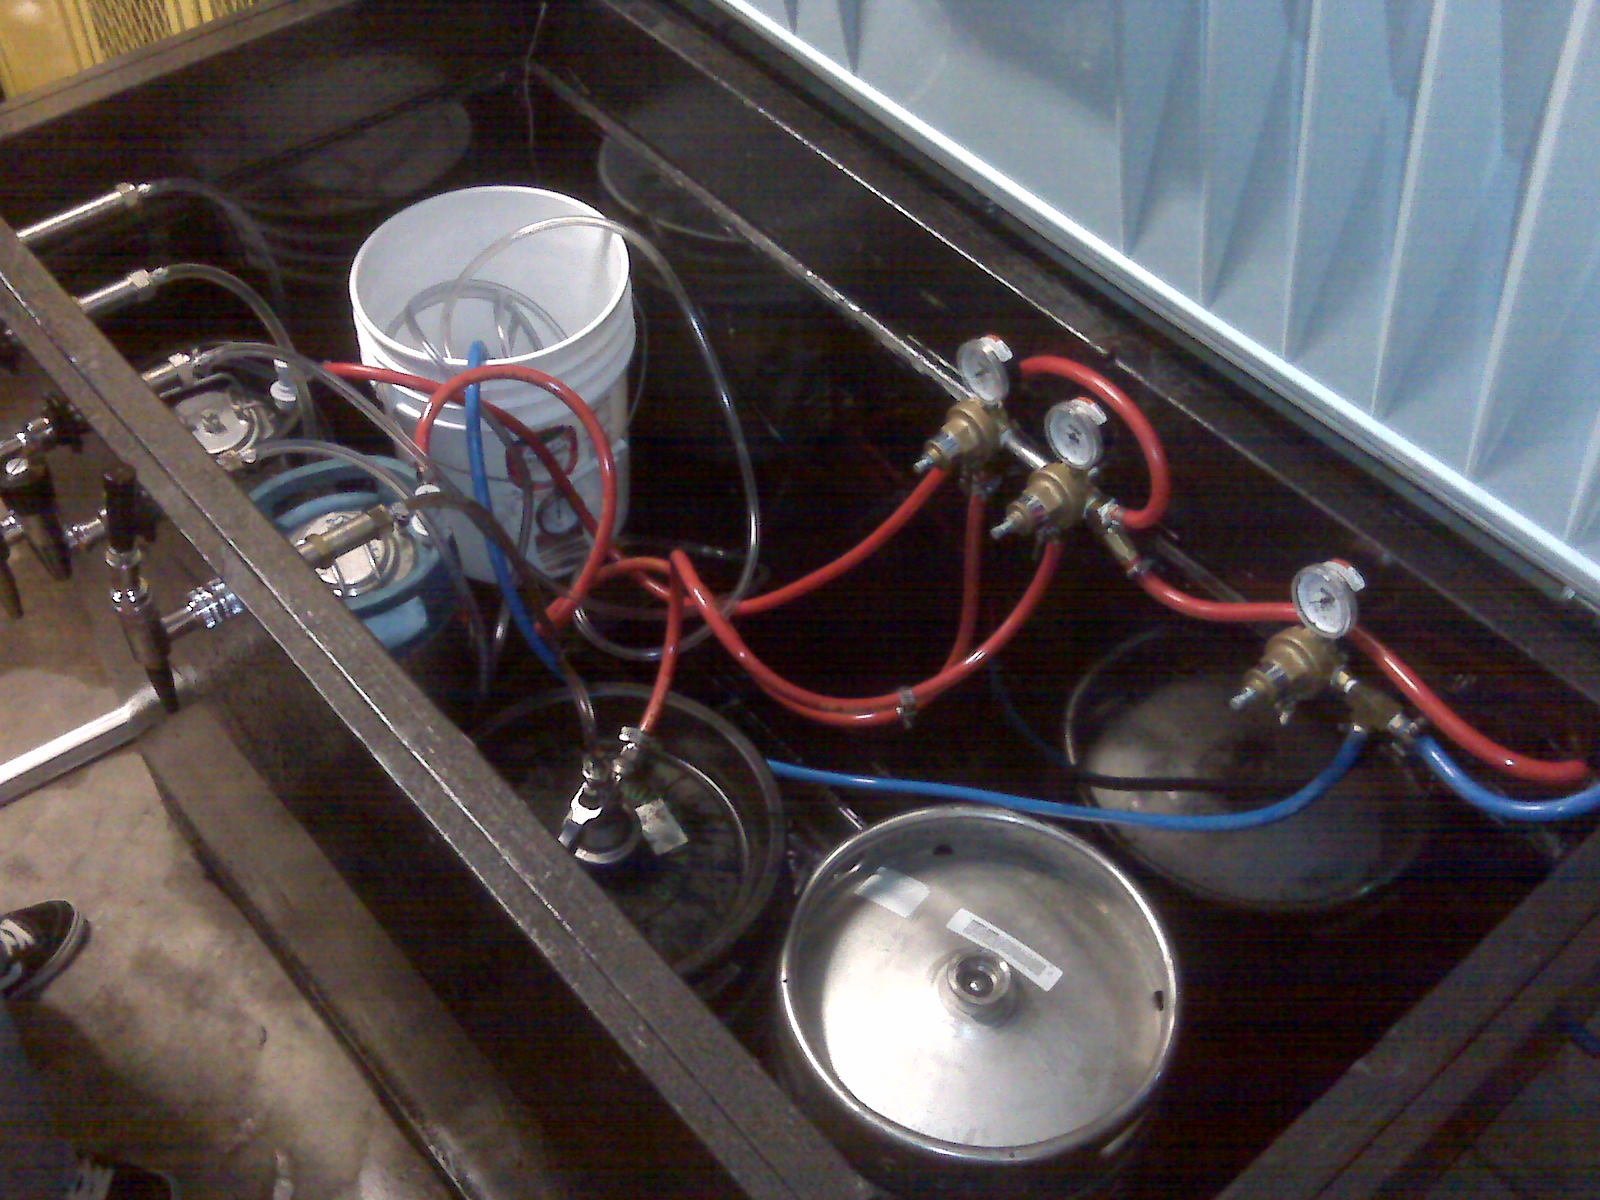
Now that I have multiple tanks, I realized I'd need to have another regulator.... so, once again, I over thought this and decided to use "secondary" regulators on both the nitrogen bottle and CO2 bottle so I could independently control the gas pressure to each keg instead of using 'Y' connectors and not being able to vary the pressure in each keg. On the CO2 bottle I have a
 primary regulator and a line going into the kegerator where I have 2 secondary regulators. The primary would be used to force carbonate my soda and seltzer, the two secondaries can be used independently for beers that may require slightly different carbonation. On the nitrogen bottle, I am using a primary regulator with a line going to a single secondary regulator inside the kegerator. I did this so I can dispense multiple "nitrogen" beers without having issues as well; I have heard that the pressure of many of these can be drastically different from one another.
Now, since I have decided to dispense Guinness, I know I needed the coupler
 (Type U) that is specific to Guinness, Harp, Smithwicks, and a few others. I also like Boddingtons, so I needed the coupler for that type of keg too (Type G). To make a long story short, I decided it would be easier if I had at least one coupler of each one of the major types so I didn't have to worry about it when I was ready to tap a keg - I have 2 of Type S, U, and D and one each of Type G & A (talk about overkill).
So, as you can see, I have built a kegerator that will hold at a minimum of 2 Cornelius Kegs (one for soda, one for seltzer), 2 half barrels, and a squat 1/4 barrel (pony). After further fenegaling, it looks like I'll be able to stack 2 squat ponys' to fit an extra one (and maybe even another Cornelius) if I want a bunch of variety.
The test run:
So I had to go get a little more CO2 line from 104th Discount Liquor (they have the red line and it is cheaper there)....while I was there I schmoozed with the guys working there and traded an extra tap handle or two I had on hand for some much needed used parts. I also picked up a pony of Ayinger.
Good thing my test beer (for the CO2 portion) was German and used the slider type A coupler. I tapped it and my new kegerator was now a big mess. One of the o-rings on the coupler was old and leaked quite badly. All was well after another trip to 104th Liquor where the guys took good care of me and found me another o-ring. Always good to work out the bugs before a party.
Also on tap is a Corney of seltzer and ginger ale.
Next up, test out a nitrogen beers and get a keg of Guinness dialed in.
And to think.... I used to hate beer ;-)
This project wasn't exactly "done on the cheap", but every effort was made to keep costs down. Here is a link to my parts list with prices (all prices include shipping, taxes, etc. where applicable).


No comments:
Post a Comment